
Table of Contents
- Installation is easy
- Your safety first
- Your amp's safety second
- Step-by-step guide
- 1) Unscrew the back panel
- 2) Remove the back panel
- 3) Unscrew the speaker
- 4) Remove the speaker
- 5) Position your new speaker
- 6) Replace the speaker screws
- 7) Attach the connectors
- 8) Replace the back panel
- 9) Plug in
- For more complex amp work
Installation is easy
This can be done at home in minutes with just a screwdriver.
Follow the video and step-by-step guide below.
Remember to check speaker cabinet fit before buying.
-Turtle 🐢
#mindyourtone
Your safety first
Always turn off, unplug and let your amp rest before opening it up. Amp capacitors may contain undischarged current that could kill you. Leave it unplugged for at least 2 hours to be safe.
Never, ever, work on an amp while its connected to power.
Your amp's safety second
Never turn on an amp without speakers connected. The absence of a speaker impedance load could damage your amp head.
Also Important: the speaker magnet can be very strong, so remove any objects that can be damaged eg. your watch, jewellery.
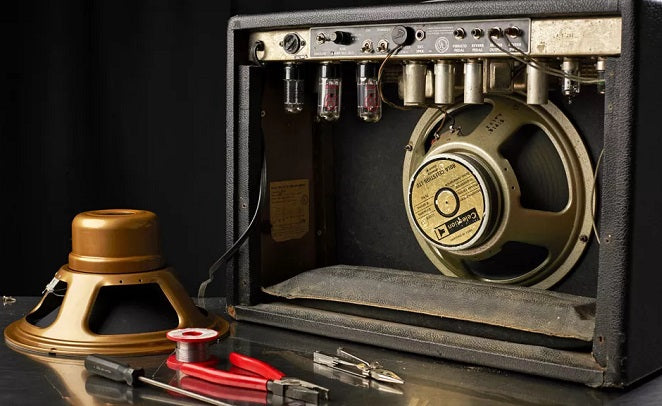
For a more in-depth, read this MusicRadar article (where I got the featured photo from).
Step-by-step guide
1) Unscrew the back panel
This is probably easiest done with a powered screwdriver.
2) Remove the back panel
Do this slowly. Some enclosures have the back panel connected to the speaker. In this case the speaker terminals must be disconnected, by reaching in with your hand, while the panel is being slowly lifted off.
Otherwise you can disconnect the terminals separately, after removing the back panel completely.
In either case, note how the terminals were connected first. Take a picture.
(Red goes on +ve terminal, usually on the left)
3) Unscrew the speaker
Suggest you do this with a manual screwdriver if possible.
4) Remove the speaker
If your combo has a reverb tank, you may have to unscrew and remove it first.
5) Position your new speaker
Do this by carefully lining up the mounting holes. Take care not to touch the speaker cone (front and back), when handling it. Make sure the terminals are positioned the same way too, usually up.
6) Replace the speaker screws
Unlike in the video, I suggest doing this by hand using a manual screwdriver and not a powered equivalent
This will minimise the risk of damaging the frame by overtighening, or damaging the speaker cone by bumping the drill into its reverse face.
If you had removed a reverb tank in step 4, replace it now.
7) Attach the connectors
Try to do this in the same way that they were connected on the old speaker.
8) Replace the back panel
Take care not to strip the screws or cabinet wood if it's an old cabinet.
9) Plug in
For amp repairs and troubleshooting
You can try these experienced amp techs on the island:
(We have no commission arrangements with them)
Jacob from Echoinox (m: 8332 5009)
Goose from Gworx (m: 8160 2111)
Randolf Arriola (m: 8268 5598)
Augustin from TY Music Centre (m: 9848 8895)
Steve from Tone Technik for Mesa Boogies (m: 9231 2321)